
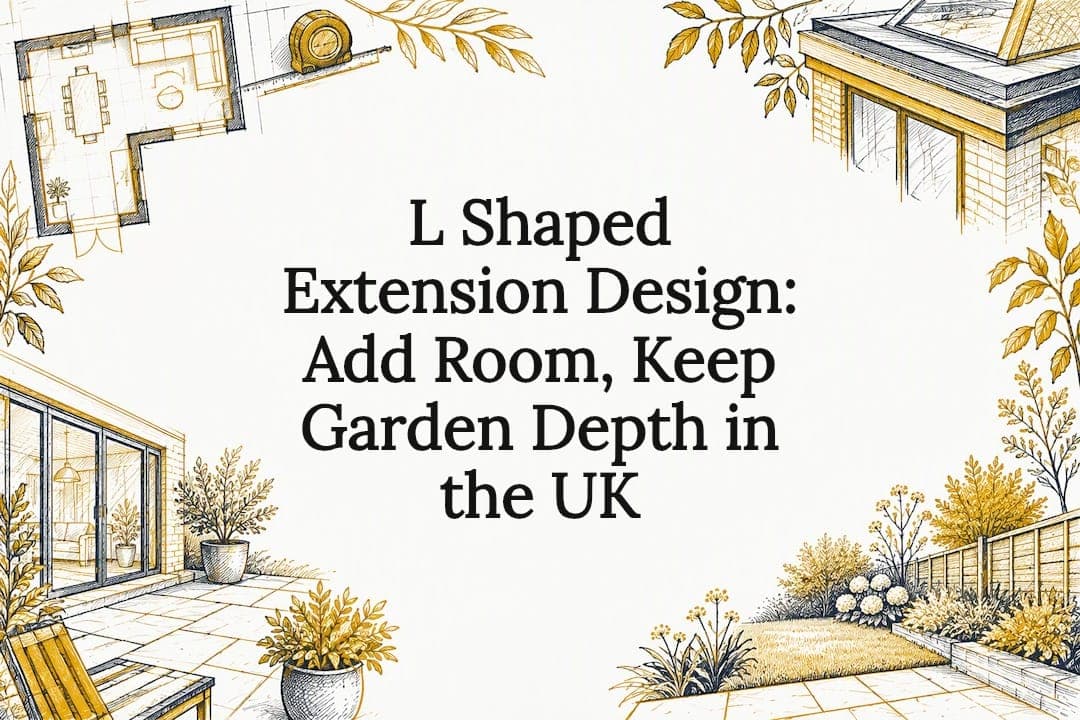
An L-shaped, or wraparound, extension combines a rear extension with a side-return to wrap around the back and side of a house, adding generous living space while keeping garden depth largely intact. It typically delivers more usable floor area, a stronger connection to the garden and a flexible open-plan hub for cooking, dining and relaxing. It is also structurally more involved than a single rear extension and, under Planning Portal rules, often needs full planning permission rather than permitted development.
TL;DR:
- A side return of 1.5 to 2 metres can create dining space while limiting garden loss; place a utility or pantry in its narrowest section.
- An appeal decision treated gaps of 10 centimetres or less between extensions as one enlargement, potentially removing permitted development rights entirely.
- Place rooflights over the old and new roof junction, with opening units near the kitchen to vent steam without opening doors in winter.
- Budget at least 10% for contingency, then price drainage diversions, ground conditions, structural steel, and upgraded glazing before fixing the project scope.
Table of Contents
- Design ideas that make an L-shaped extension work
- Planning the layout: kitchen, dining and living zones
- Keeping the extension bright and comfortable
- Choosing materials and roof treatment
- Costs and realistic timescales
- Planning permission, building regs and Party Wall rules are key steps to consider when planning a wraparound home extension.
- Choosing who designs and builds your extension
- Blending indoor and outdoor living in an L-shaped design
- Accessibility and future-proofing your extension
- Common construction challenges and how they are solved
- Why a single coordinated team reduces risk on wraparound builds
- How we can help with your L-shaped extension
- FAQ
- Sources
Design ideas that make an L-shaped extension work
The first decision is scale: a full wraparound uses both the rear and the entire side-return, while a projecting L element extends only part of the side, leaving a narrower gap to the boundary. A full wraparound suits homes wanting a large kitchen-diner and family room in one continuous space; a projecting element works well when you need extra depth in just one room, such as a utility or snug, without committing to a full-width build. Single-storey versions are the most common and least disruptive, while double-storey options add bedrooms or a home office above but bring heavier structural work and usually a longer planning process.
Glazing does most of the work in making the new space feel generous rather than boxy. Corner glazing at the junction of the rear and side elements removes the visual barrier between garden and kitchen, while bifold or sliding doors along the rear elevation extend the living space outward in warmer months. Rooflights set along the roof junction bring light into the centre of the plan, where natural light would otherwise struggle to reach.
Externally, Homebuilding's research into wraparound projects on period homes points to a few recurring design wins:
- A side-return width no wider than half the original house width keeps the extension visually balanced against the existing facade.
- Matching brick on a period property blends the addition into the street scene, while contrasting cladding on a modern home can make the new section a deliberate feature.
- Flat or low-pitched roofs at the side-return junction keep ceiling heights workable where a traditional pitch would clash with existing windows.
- A window seat built into a bay or corner glazing turns otherwise awkward dead space into a usable spot.
Small details carry weight too. Orienting a kitchen island parallel to the main run of glazing keeps sightlines open to the garden, and integrated storage along the side-return wall avoids the need for freestanding units that interrupt the flow between old and new.
Planning the layout: kitchen, dining and living zones
Getting the zoning right prevents an L-shaped extension turning into three separate, oddly connected rooms. A few patterns consistently work well:
- Place the kitchen in the rear section nearest the existing house, so plumbing and drainage runs stay short and services are easier to connect.
- Use the side-return as the link between kitchen and garden, often as dining space, so it reads as a connecting zone rather than a corridor.
- Position the living or snug area furthest from the kitchen, ideally where the L turns, to create a natural separation from cooking noise and smells.
- Tuck a utility room, cloakroom or pantry into the narrowest part of the side-return, where it would otherwise be wasted circulation space.
- Remove internal walls between the original rear reception and the new extension wherever structurally possible, since Homebuilding notes that wraparound projects succeed as much through reconfigured circulation as through added floor area.
Orienting the island so its long edge runs parallel to the main walkway, rather than across it, stops the kitchen becoming a bottleneck between the back door and the rest of the house. Footprint-wise, a side-return rarely needs to exceed 1.5 to 2 metres in width to transform a galley kitchen into a proper dining space, which keeps garden loss modest even on a full wraparound.
Keeping the extension bright and comfortable
Dark corridors are the most common complaint about wraparound extensions, usually caused by isolating the original rear reception from new daylight sources. Ideal Home's guidance on wraparound projects recommends rooflights or glazed courtyards positioned adjacent to the existing rooms to keep daylight moving through the whole floorplan rather than stopping at the new glazing.
A few practical measures make a measurable difference:
- Position a roof lantern or linear rooflight directly over the junction between old and new roofs, where natural light is weakest.
- Specify low-E glazing to cut heat loss in winter without sacrificing the view, and solar-control glass on south-facing elevations to manage summer heat gain.
- Plan cross-ventilation with openable rooflights plus doors or windows on opposite elevations, rather than relying on bifolds alone.
- Use external shading, such as a deep roof overhang or brise soleil, on glazing that faces direct afternoon sun.
Pro Tip: Specify rooflights with an electric opening function near the kitchen so steam and cooking odours clear quickly without opening full-height doors in winter.
Large glazed areas cost more to install and to maintain than standard windows, so factor cleaning access and eventual reseal of door gaskets into your long-term budget.
Choosing materials and roof treatment
Whether to match or contrast the original brickwork depends on the house and the street. On a period property, matching brick (or a close reclaimed match) keeps the extension visually subordinate to the original house, which planners often favour. On a more contemporary or already-altered property, a contrasting material such as render, timber cladding or dark-stained boarding can mark the extension as a distinct, confident addition.
- Pitched roofs at the side-return junction suit homes where matching the existing roofline matters, though they can restrict ceiling height.
- Flat roofs free up internal headroom and simplify the junction with the main roof, which is where leaks are most likely to start.
- Considered detailing, such as a recessed junction or a change in material at the roofline, signals the new work was designed rather than tacked on.
- Natural slate and clay tiles last longer but cost more to maintain than single-ply flat roofing, which needs periodic inspection of seams and upstands.
Costs and realistic timescales
Costs for a single-storey L-shaped or wraparound extension vary widely because they combine two build types, a rear extension and a side-return, each with its own foundations, drainage and structural work. Homebuilding notes that wraparound projects typically cost more than a straightforward rear extension because of this added structural complexity and the extra engineering and drainage involved.
The RICS UK Construction Monitor for Q1 2026 reports continuing upward pressure on tender prices and material costs, which means budgets set even a year ago may no longer reflect current build costs.
Key cost drivers include:
- Structural steelwork and foundation depth, which increase sharply where the side-return sits over variable ground conditions.
- Drainage diversions, since a side-return extension frequently sits over or near existing manholes and soil pipes.
- Glazing specification, with corner glazing and lantern rooflights costing considerably more than standard window units.
- Party Wall surveyor fees where the build sits close to a neighbouring boundary.
A typical project runs through four phases: initial brief and concept design, detailed design and planning submission, building regulations and contractor procurement, then on-site construction and fit-out, with the design and approval stages often taking as long as the build itself. For West Midlands-specific figures, our wraparound extension cost guide sets out indicative ranges by project size.
Planning permission, building regs and Party Wall rules are key steps to consider when planning a wraparound home extension.
Many homeowners assume a wraparound extension will fall under permitted development, but the combined size of a rear and side extension frequently exceeds the limits set out by the Planning Portal, which treats joined enlargements as a single structure when assessing depth, height and coverage. That often pushes the project into a full planning application.
- Check single-storey rear extension depth limits and the rule that single-storey side extensions must not exceed half the width of the original house.
- Be aware that a Planning Inspectorate appeal decision found a gap of 10 centimetres or less between two extensions was treated as a single enlargement, removing permitted development rights entirely.
- Notify neighbours under the Party Wall Act and instruct a surveyor where work sits on or near a shared boundary, particularly on semi-detached or terraced properties.
- Seek pre-application planning advice and involve a structural engineer early, since RICS guidance links early professional input to fewer costly changes once building starts.
Our guide to side extension planning rules covers the dimensional limits in more detail for readers checking what their specific plot allows.
Choosing who designs and builds your extension
Architect-led procurement gives you a dedicated designer who tenders the build separately, which can suit homeowners wanting an independent design voice. A design-and-build managed team, by contrast, carries design, planning and construction under one point of contact, which RICS guidance links to fewer change orders because responsibility for Party Wall matters and neighbour liaison sits with a single team rather than being split across separate consultants.
Before appointing anyone, ask:
- Can they show completed wraparound or L-shaped projects similar to yours, including how they handled the roof junction?
- Who manages planning submissions and Party Wall notices, and is that included in their fee?
- What is their realistic programme from brief to handover, and how do stage payments align with it?
- Is their quotation fixed-price or subject to provisional sums that could move later?
Pro Tip: Ask to see a detailed stage-by-stage deliverables list before signing anything, so you know exactly what drawings, approvals and sign-offs you receive at each payment milestone.
Look for RICS-linked professional standards, a portfolio of comparable projects and genuine client feedback when comparing quotes, and treat a vague or verbal-only scope as a warning sign.
Blending indoor and outdoor living in an L-shaped design
The corner formed by an L-shaped extension naturally frames a section of garden, and that framing is worth designing around rather than leaving as leftover space. Positioning the main sliding or bifold doors to face the most sheltered or sunniest part of the garden turns that corner into a usable outdoor room for much of the year, particularly when paired with a covered section of patio that extends the roofline slightly beyond the glazing line.

A continuous or closely matched floor finish between the kitchen-diner and an adjoining patio reduces the visual break at the threshold, making the extension read as one space that happens to have a door in the middle. Raised beds, built-in seating or a pergola positioned to align with the extension's corner can reinforce that connection without demanding major landscaping work.
Drainage and levels need early attention here: patios and paths against the new extension must fall away from the building, and thresholds should sit above damp-proof course level, which can mean a step down to the garden on older properties. Where the garden is overlooked, planting or screening along the side-return boundary preserves privacy for both the new glazing and any outdoor seating area, and it is far easier to plan this at design stage than to retrofit screening once the build is finished.
Accessibility and future-proofing your extension
An L-shaped extension is often the moment to build in features that make a home easier to live in for decades, not just for the household's current needs. Level thresholds between the extension and garden avoid trip hazards and support wheelchair or pushchair access, and they cost very little extra when specified at design stage rather than added later.
Wider doorways, typically at least 800mm clear opening, through the kitchen-diner and into any ground-floor WC make the space usable for visitors or family members with mobility needs. If a ground-floor cloakroom is part of the plan, positioning it with enough floor area to add grab rails or a wider door later, even if not needed immediately, avoids a second round of building work in future.
Underfloor heating, increasingly common in L-shaped extensions with large glazed areas, frees up wall space that would otherwise hold radiators and keeps floors clear for easier movement. Running extra electrical conduit or ducting during the build, even if unused initially, gives flexibility for future adaptations such as stairlifts, home automation or additional lighting circuits without disturbing finished walls or floors.
Common construction challenges and how they are solved
Drainage is the challenge that catches out the most L-shaped projects, since a side-return extension frequently has to negotiate existing manholes, soil pipes or shared drains running close to the boundary. Diverting a drain run or building over it with the correct protective measures adds cost and time, so a drainage survey early in the design process avoids redesigning the footprint mid-project.

Structural support at the junction where two rooflines or two extensions meet is the second recurring issue. Steel beams are usually needed to carry loads where internal walls are removed to create open-plan space, and Homebuilding's analysis of wraparound builds identifies roof junctions, where different eaves or pitches meet, as the most frequent source of technical complexity. Budgeting for specialist flashing and leadwork at these junctions from the outset prevents water ingress problems later.
Uneven ground conditions beneath the side-return, particularly on older properties where original foundations were shallow, can require deeper or engineered foundations than first assumed. A trial pit dug before finalising the structural design gives a much more accurate cost picture than relying on assumptions from the main house's foundations. For homeowners on semi-detached plots, our guide to semi-detached extension ideas covers how Party Wall issues interact with these structural decisions in more detail.
Why a single coordinated team reduces risk on wraparound builds
Wraparound projects fail most often where design, planning and structural decisions are handled by separate parties who are not talking to each other: a drainage clash discovered after planning approval, or a Party Wall notice sent too late to avoid delay. A single team carrying design through to build keeps those decisions connected from the first sketch, which is why we built our process around exactly that at Extension Kings. Homeowners working with a managed team should expect one point of contact, a realistic budget before site survey, and clear handling of planning and building regulations throughout.
— Raja
How we can help with your L-shaped extension
We offer design and build services for single-storey, double-storey, kitchen, rear, side-return and wraparound extensions, managing planning submissions, building regulations and project coordination as one team from first consultation to handover.
If you are weighing up an L-shaped or wraparound extension, our West Midlands extension cost guide sets out indicative budgets for your area, and we are happy to talk through your plot and give you a realistic starting point. Visit Extension Kings to arrange a consultation.
FAQ
What is the difference between an L-shaped and a wraparound extension?
An L-shaped extension and a wraparound extension both describe the same approach: combining a rear extension with a side-return so the new build wraps around the back and side of the house. The terms are used interchangeably in most Homebuilding guidance on the subject.
Does an L-shaped extension always need planning permission?
Not always, but it is common, because Planning Portal rules assess joined rear and side elements together against permitted development limits on height, depth and coverage. A Planning Inspectorate appeal also found that even a small gap between two extensions can be treated as one combined structure, removing permitted development rights.
How do I stop an L-shaped extension feeling like a dark corridor?
Position rooflights or a lantern directly over the junction where the rear and side sections meet, since this is usually where daylight struggles most. Ideal Home also recommends glazed doors or a courtyard adjacent to the original rear room to keep light moving through the whole plan.
Should I appoint an architect or a design-and-build company?
An architect-led route suits homeowners wanting an independent design voice who then tender the build separately, while a design-and-build team manages design, planning and construction under one contract. RICS guidance links strong project coordination, which a single managed team can offer, to fewer cost overruns on structurally complex projects like wraparounds.
How much contingency should I budget for a wraparound extension?
A contingency of at least 10% is a sensible starting point, reflecting the upward pressure on tender prices and material costs reported in the RICS UK Construction Monitor for Q1 2026. Exact costs still depend heavily on ground conditions, drainage diversions and glazing specification.
Sources
- Wrap around extensions: Extra space and twice the impact | Homebuilding
- Home extensions and improvements — Planning Portal
- Planning Inspectorate appeal decision (example) — document
- RICS UK Construction Monitor Q1 2026